|
|
|

How to Draw a Daisy
Home > Maja Thoenes > Blue Daisy
ADVERTISEMENT
In this lesson, learn how to draw a daisy! Maja makes it easy and fun through step-by-step lessons. A daisy is the perfect thing to draw to brighten anyone's day! Personalize your daisy by adding different colors and petal shapes. You could even draw a whole garden of daisies! Up for a bigger challenge? Try drawing the daisy from a different angle, or tipping the daisy's stem downwards to reveal the backside of the petals. See how many different daisies you can draw!
ADVERTISEMENT
1. Placement for How to Draw a Daisy
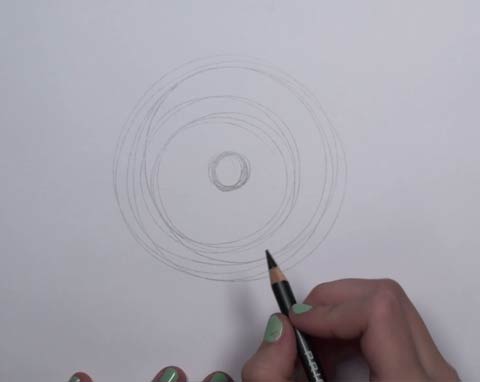
Begin your daisy by drawing a large circle in the middle of your paper. This circle will act as the placement for your petals. Follow by drawing a smaller circle inside the big circle. This little circle will act as the placement for the center of the daisy.
2. First Petals
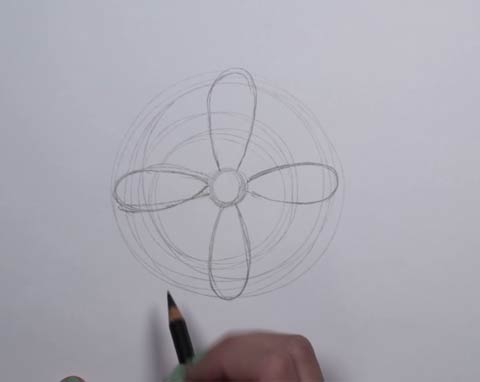
Next, start your petals. A good strategy for creating evenly distributed petals is to draw the horizontal and vertical petals first, leaving even spaces for the diagonal petals. Draw the petals for the daisy in a teardrop shape. If you are having trouble creating that teardrop shape on the side petals, try moving the paper so that you can draw them up and down. Just find the easiest angle, and go for it!
3. Second Petals, Stem and Leaf
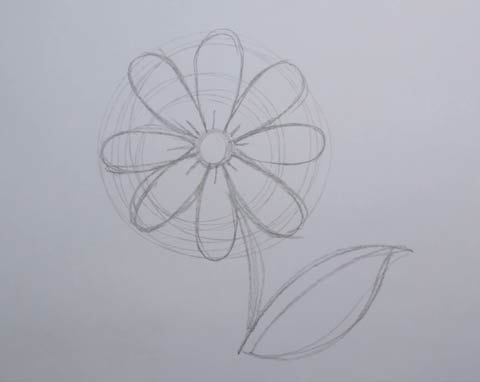
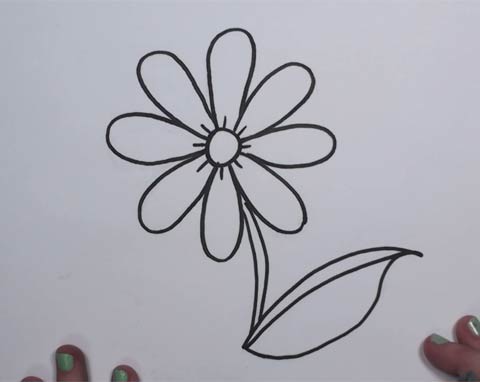
For Step three, complete the diagonal petals. Add creases in the inside of the petals by drawing a few tiny lines. Continue by drawing a stem, and adding a leaf.
4. Inking
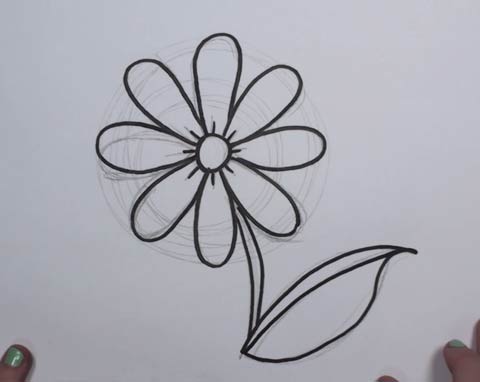
Once you are happy with your penciling, take a marker, sharpie or pen and trace over all of the pencil lines. Pay special attention to the lines that overlap, like the stem and the leaf.
5. Erasing
Next, erase all of the pencil lines. Make sure to give your pen or marker a few moments to dry, as to not smear the ink. You now have a clean and clear flower ready for coloring!
6. Coloring
Chose a color for your daisy! In my case, I chose blue. Use a light blue for the petals, and a darker blue for the shadows on the inside and downward edges of the petals. A yellow center is very popular. Make it pop by adding a little orange shading to the bottom! A light green is used for the leaf, along with a darker green for the stem and the shading. Sign your name in the corner, and you are done!!
Video Lesson by Maja Thoenes
Watch and follow along as Maja shows you how she created this awesome blue daisy.
Congratulation! - you have finished the "How to Draw a Blue Daisy" online drawing lesson.
Return from How to Draw a Daisy to Home



New! Comments
Have your say about our drawing lessons! Leave us a comment in the box below.