|
|
|

How to Draw a Dragon Sitting
Smart Art Institute Online - Drawing and Painting Art Lessons
CHALLENGING DRAGON TO DRAW. This not an easy dragon to draw. But with the steps you can draw this dragon sitting. I challenge you to draw and color this dragon and submit it to the art gallery. you can do it.
ADVERTISEMENT
Now let's get started with the How to Draw a Dragon Sitting drawing tutorial This is a hard dragon to draw.
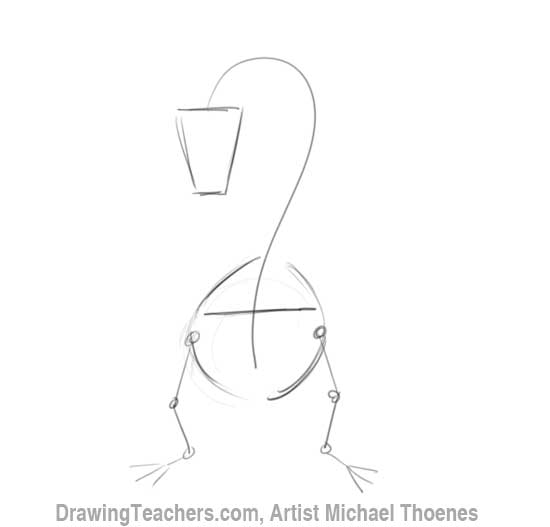
Dragon Sitting Drawing Tutorial Part 1:
Begin your dragon with a question mark shape for the neck . Draw a line across the base roughly where you plan to connect the front legs or arms. Sketch a circular shape around this crossing to form the dragons chest area. Hang a tapered trapezoid form the top of the question mark shape neck to place the dragon's head.

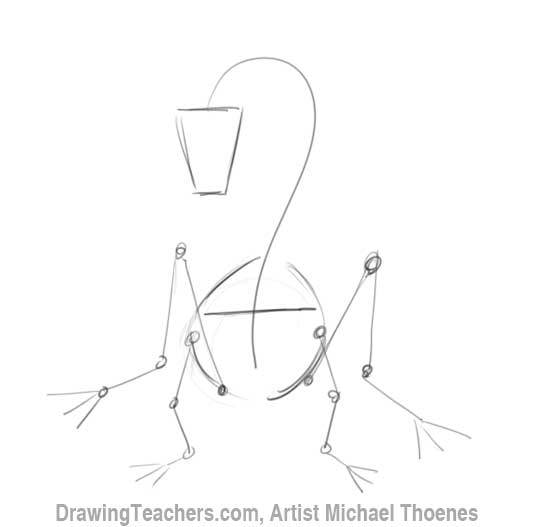
Dragon Sitting Drawing Tutorial Part 2:
Position the dragon's front legs with small circles for the joints and lines to indicate the bones. Sketch these lightly as you make need to adjust your drawing later, and you will want to be able to erase these lines later.
Dragon Sitting Drawing Tutorial Part 3:
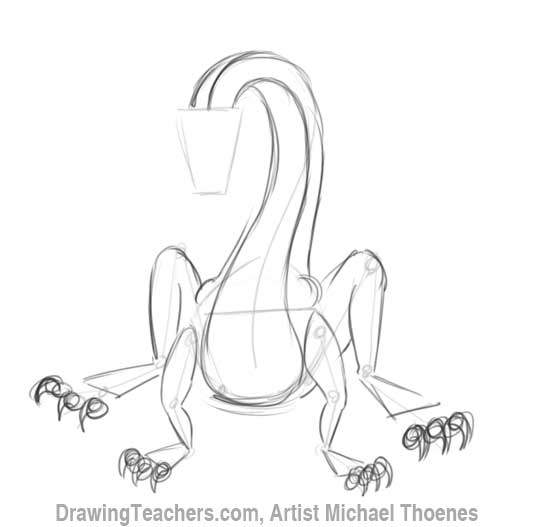
For the rear legs use circles for joints and lines for bones again.
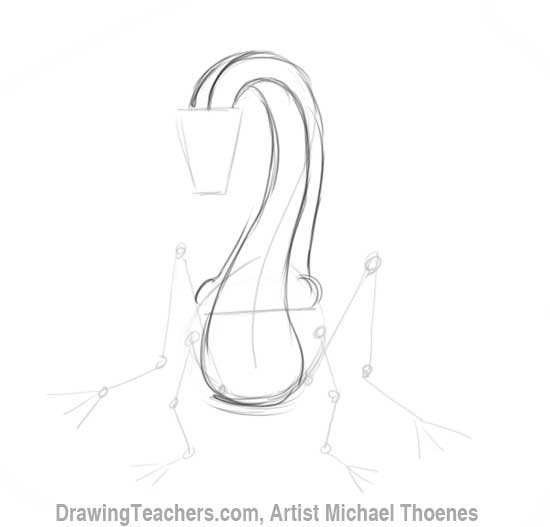
Dragon Sitting Drawing Tutorial Part 4:
Sketch the dragon's neck using your original curve as a guide. You can make adjustments as you draw the neck if the curve does not feel right. I have shifted the neck some towards one side of the original curve.
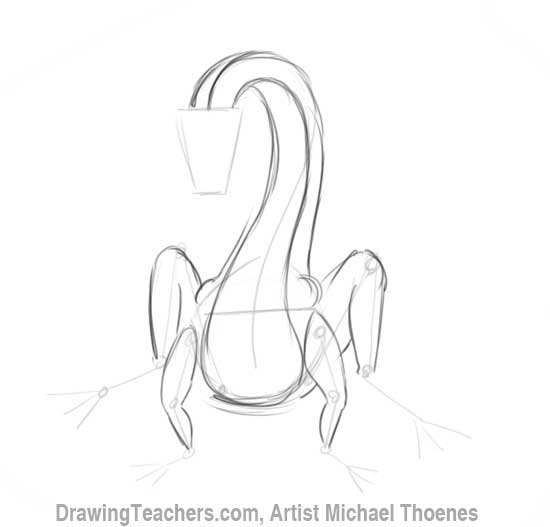
Dragon Sitting Drawing Tutorial Part 5:
Sketch the outline if the legs using the stick bones and ball joints as your guide.
Dragon Sitting Drawing Tutorial Part 6:
Sketch the dragons feet using triangular shapes and place the toes and claws.
Dragon Sitting Drawing Tutorial Part 7:
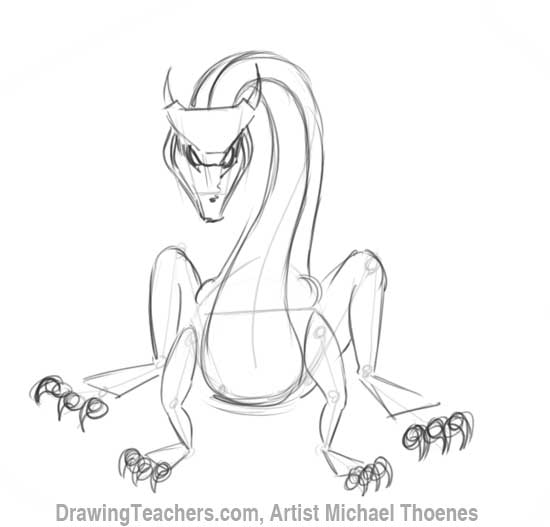
Sketch the head for your dragon using the trapezoid as a guide.
Dragon Sitting Drawing Tutorial Part 8:
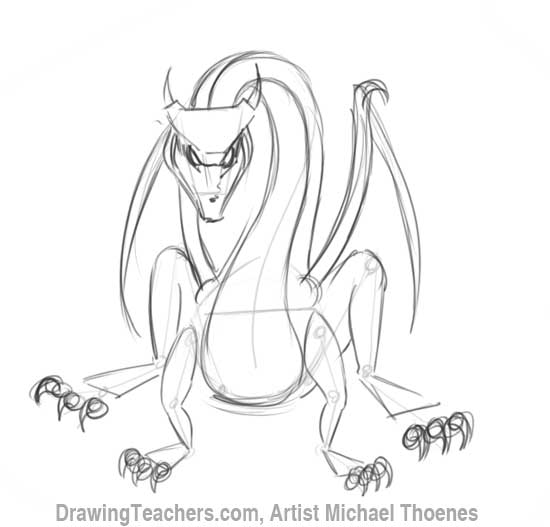
Use long sweeping curves to to sketch the shape of the dragon's wing structure.
Dragon Sitting Drawing Tutorial Part 9:
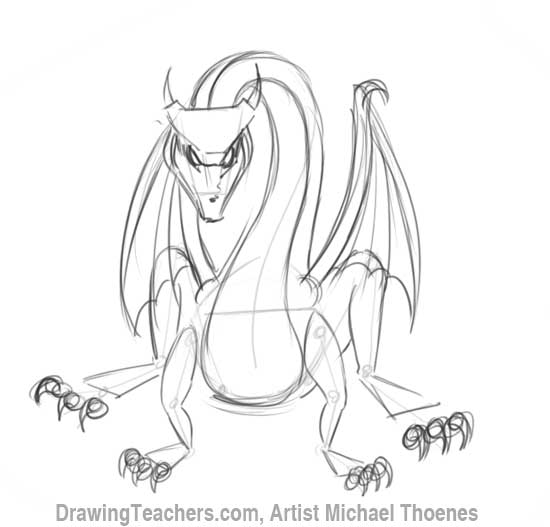
Add ribs to the wings and connect them with skin.
Dragon Sitting Drawing Tutorial Part 10:
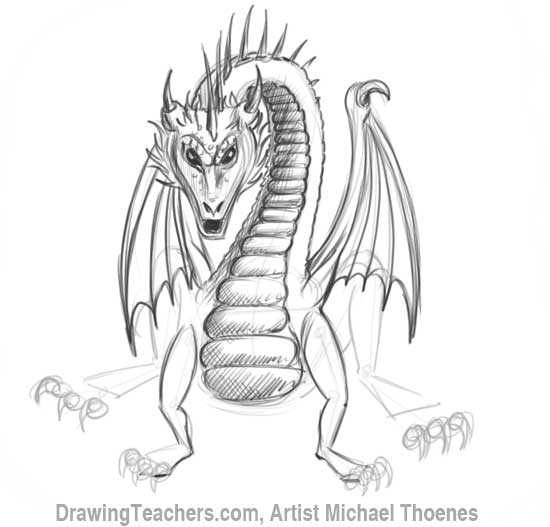
Refine the head and add large armored plates or scales to the front of the neck and underbelly.
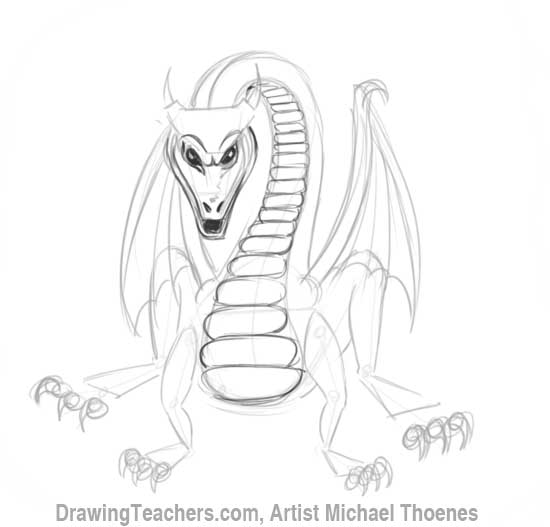
Dragon Sitting Drawing Tutorial Part 11:
Add flame-like spikes to the sides and top of the head and continue the spikes along the back of the dragon's neck.
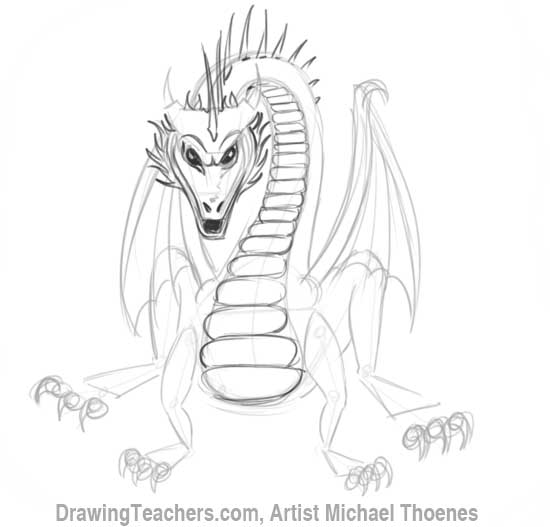
Dragon Sitting Drawing Tutorial Part 12:
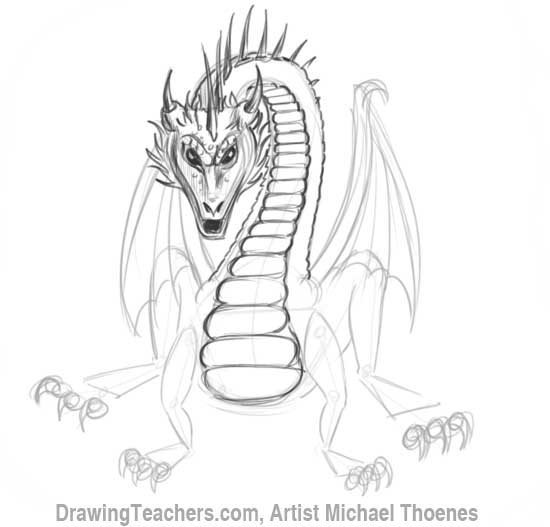
Continue to work your way down the neck adding detail.
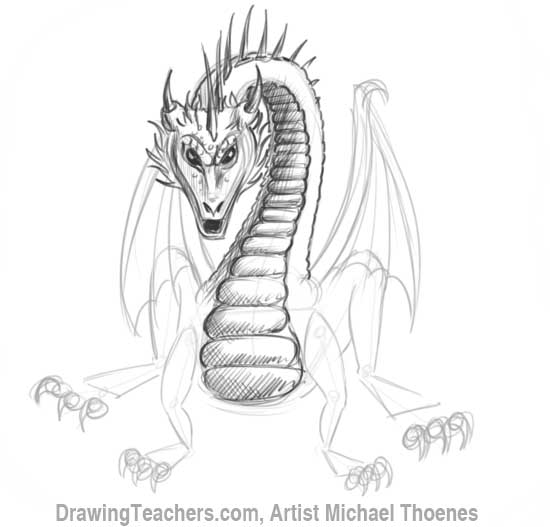
Dragon Sitting Drawing Tutorial Part 13:
Shade the neck to give it form. I have used cross hatching to darken the underside of the neck and and the lower parts of the armored plates or scales.
Dragon Sitting Drawing Tutorial Part 14:
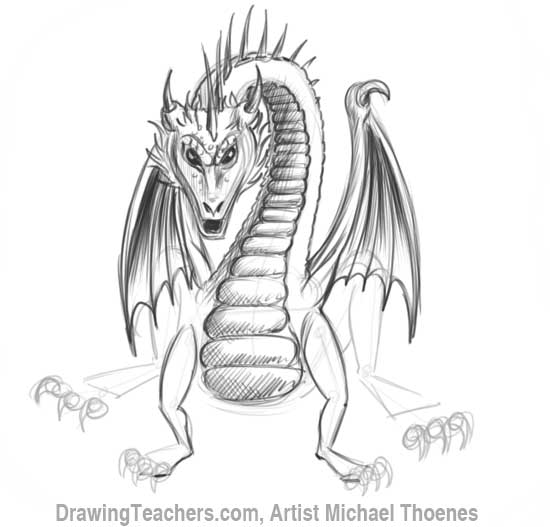
Refine and detail the wings and legs.
Dragon Sitting Drawing Tutorial Part 15:
Shade the underside of the wings.
Dragon Sitting Drawing Tutorial Part 16:
Complete the back legs.
Dragon Sitting Drawing Tutorial Part 17:
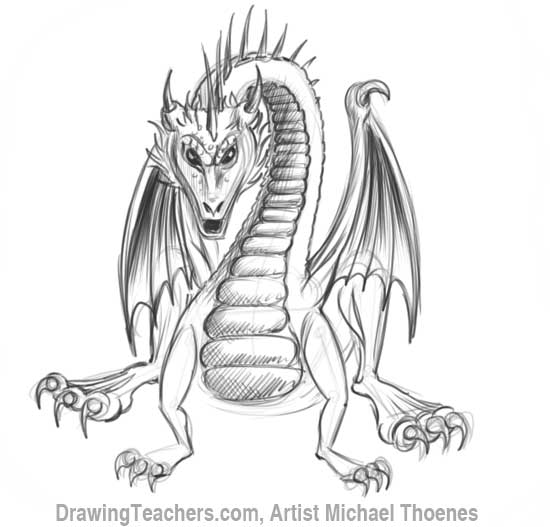
Complete the belly area and refine the feet.
Dragon Sitting Drawing Tutorial Part 18:
Add scales to the dragon's skin.
Dragon Sitting Drawing Tutorial Part 19:
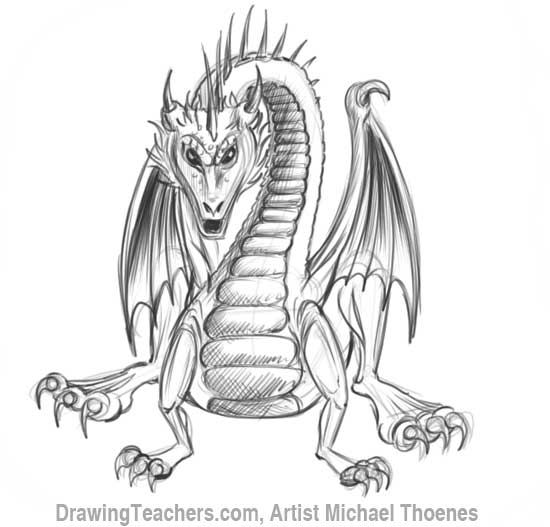
Add a shadow under your dragon to place him on the ground.

Dragon Sitting Drawing Tutorial Part 20:
Complete the shadow under the tail.
Dragon Sitting Drawing Tutorial Part 21:
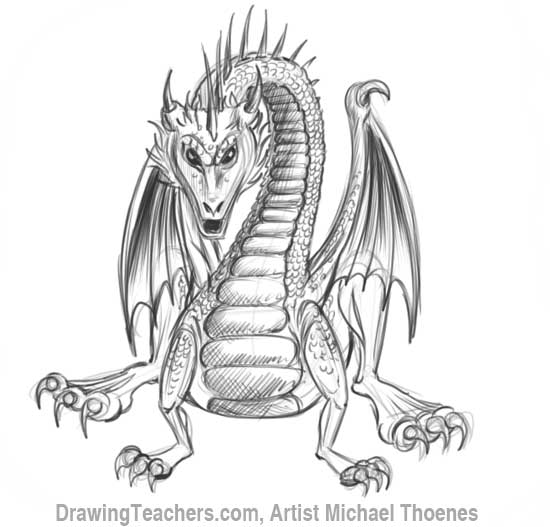
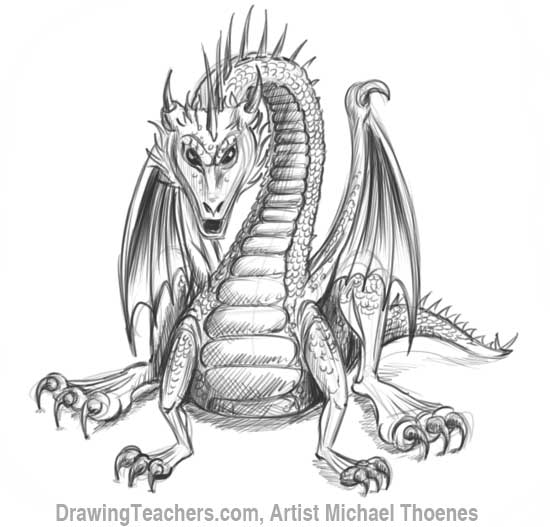
Darken and refine your drawing with pencil or ink.
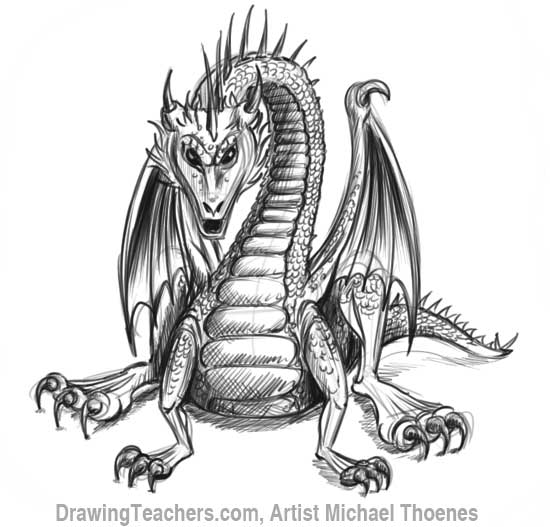
Congratulations you have finished this online art lesson,
"How to Draw a Dragon Sitting!" A hard dragon to draw.
Great Job!
Smart Links
Return from How to Draw a Dragon Sitting to Home
Recommended Additional Learning:
Want to learn more on this topic? We’ve got you covered. Check out these resources:
- How to Improve Your Creature Design Drawings - Step by Step
- How to Digitally Draw/Paint a Realistic Dragon in Photoshop
- How to Draw Awesome Poses: Figures in Action
(Please note that Drawingteachers.com receives affiliate payment for this referral.)
ADVERTISEMENT
SITE NAVIGATION
New Lessons & Articles
-
Untitled Document
Oct 02, 17 05:24 PM
-
How to Draw Tears of Joy Emoji
Sep 29, 16 08:50 PM
How to Draw a Tears of Joy Emoji Step by Step; Great Drawing Lesson for Kids -
How to Draw Emojis
Sep 29, 16 08:35 PM
How to Draw Emojis for Kids - Easy Art lessons for beginners! Drawing Teachers' Emoji drawing videos teach you step by step.


New! Comments
Have your say about our drawing lessons! Leave us a comment in the box below.