|
|
|

How to Draw a Puppy Face
Home > Cheri Crawford > Puppy Face
ADVERTISEMENT
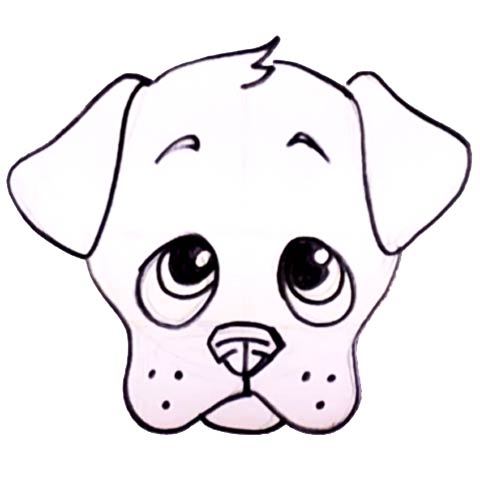
In this lesson, learn how to draw a puppy face! Cheri makes it fun and easy through step-by-step instructions, consisting of pictures and commentary.
|
Once you have drawn the puppy face, personalize it by adding color and a background! If you're up for a bigger challenge, try changing the puppy's expression, or substituting his floppy ears for pointy ones. Try coloring you puppy face with crayons, markers or colored pencils. |
ADVERTISEMENT
This Lesson Teaches:
- Drawing with Shapes
Suggested Drawing Supplies:
- Drawing Paper
- Pencils and Markers for Coloring
Lets get started with the lesson "How to Draw a Puppy Face" Follow the step by step instructions. You can also follow along with the video by Cheri Crawford found at the end of the lesson.
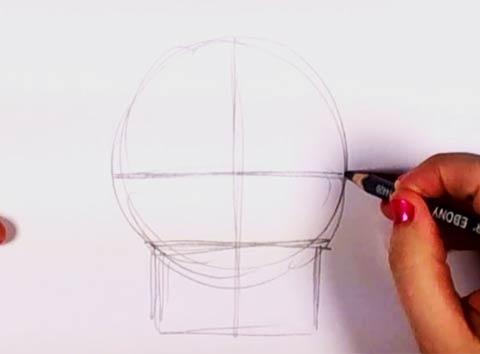
1. Setting the Proportions
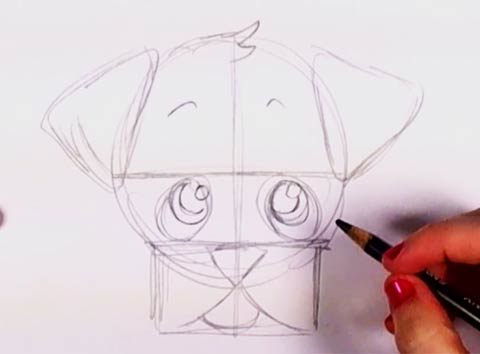
Begin by drawing a circle in the center of your page. Draw a horizontal line through the middle of the circle, followed by a vertical one. These will be the placements for the eyes and nose. Lastly, draw a rectangle across the bottom of the circle. The rectangle will become the mouth and nose.
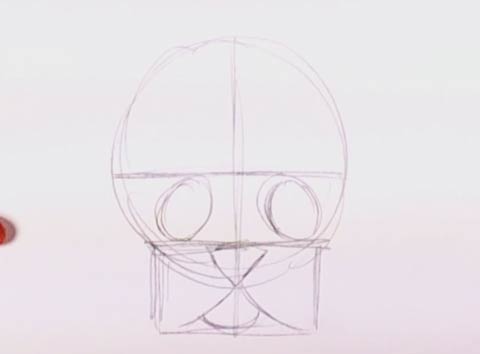
2. Adding Features
For step two, draw two egg shaped circles above the rectangle for the eyes. Notice how the tops of the eyes touch the horizontal placement lines. Next, draw an upside down triangle in the middle-top of the rectangle for the nose. Add lines for the cheeks, and a curve near the bottom of the rectangle for the lip.
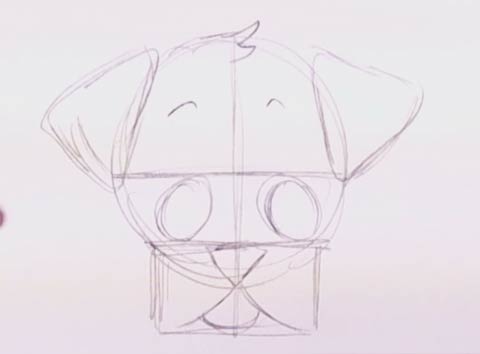
3. Ears, Hair and Eyebrows
For step three, draw two curved triangles on either side of the puppy's head for the ears. These don't need to be perfect. Add two small curves at the top of the face for eyebrows, and a small tuft of hair.
4. Eyes
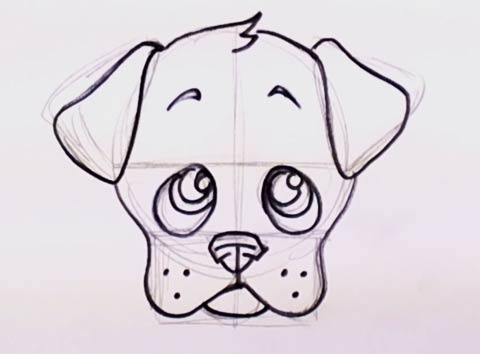
Next, add a pupil, which is the top curve inside the eye. Add the iris, which is the second and lowest curve. The iris should be smaller than the pupil when concerning animals. Add two tiny circles, called the "shines", which indicate where light is hitting the puppy's eye. These shines add to the puppy's cuteness.
5. Shaping
For step five, take your pencil and trace around everything you have already done, curving out the cheeks and the ears, giving the puppy a softer look.
6. Nose and whiskers
For step six, add small details to the nose. Also, add a few whiskers to the puppy's cheeks. These whiskers aren't like cat whiskers, though; dogs have very short whiskers. Don't worry about these too much; a few dots should be sufficient.
7. Inking
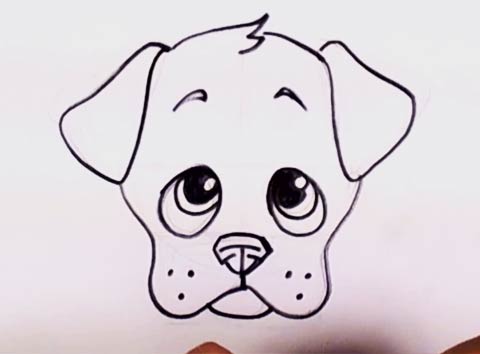
Next, take a pen, sharpie or marker and trace around all of the lines that you wish to keep. Pay special attention to the overlapping lines, such as the ears, lips, and the tuft of hair.
8. Erasing
Once you have finished inking, erase all of the pencil lines. Be sure to give your marker or pen a few moments to dry as to not smear the ink.
9. Final Touches
For the last step, fill in the pupil inside the puppy's eyes, and you are finished!
Video Lesson by Cheri Crawford
Watch and follow along as Cheri shows you how she created this adorable puppy drawing.
Congratulation! - you have finished the "How to Draw a Puppy Face" online drawing lesson.
Return from How to Draw a Puppy to Home





New! Comments
Have your say about our drawing lessons! Leave us a comment in the box below.