|
|
|

How to Paint a Wine Glass
Home > Drawing Teachers > Pamela Wang > Paint Wine Glass
ADVERTISEMENT
|
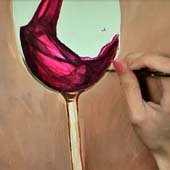
Learn how to paint! I don’t know what it is about wine, but I really want to paint it. I particularly enjoy painting wine in glasses… and today, we are going to do just that! It’s time to pull out your acrylic paints (in colors red, blue, yellow, black, white, and brown), a cup of water, some paint brushes, a paper plate (something for a palette), a pencil, an eraser, and a ruler. |
 |
You will need the following materials
- Canvas
- Acrylic Paints
- Paint Brushes
- Pencil and eraser
- Ruler
You can follow the pictures or watch the video at end of this lesson
Your canvas can be any size you want it to be. The best way to figure out which canvas size to use is to decide if this is something you want to hang in your house. If it is, think of where you’d want it and what size and shape would look good in that spot.
Now that you have your supplies and canvas chosen, let’s get started!
ADVERTISEMENT
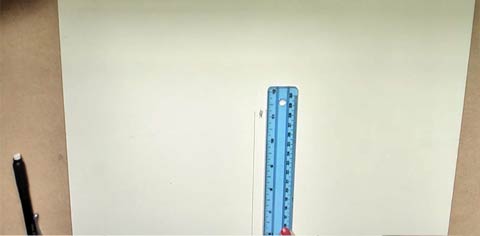
1. Mark the Center of Your Canvas
Find the center of your canvas with your ruler and make a mark. On either side of the mark, use our ruler to make the long straight stem of the wine glass.
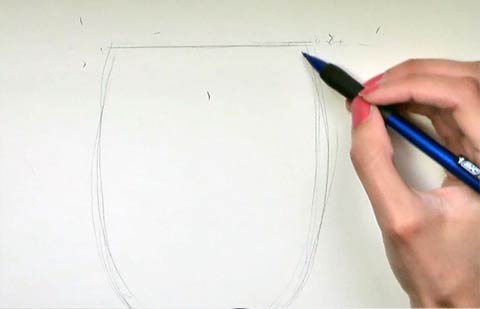
2. Draw the Top of the Glass
At the top of your stem, draw a U shape and draw a straight line over the top of the U.
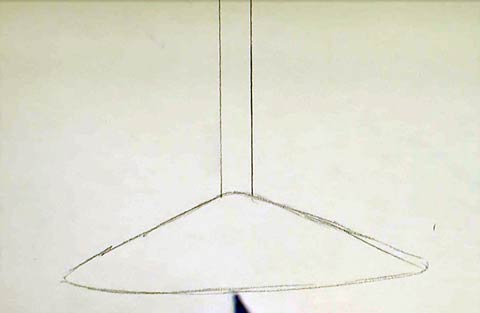
3. Draw the Base of the Glass
At the bottom of the stem, draw a triangle shape with slightly rounded edges.
4. The Wine
From the top of the canvas, draw the wine splashing into the U shaped glass. (The wine can be coming from anywhere on the top and as close to the edges of the canvas as you want.)

5. Paint the Wine
Now for the fun part! Lay your palette out and put a little bit of red on it. Dip your brush into the water, then dip it into the red paint, and lastly apply it to the canvas and paint the wine. This will be our first layer on the wine
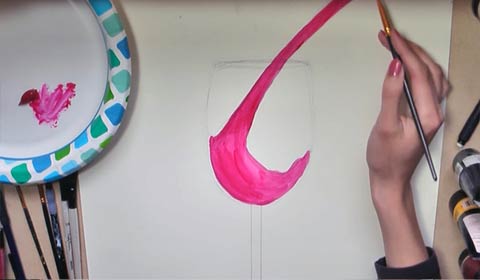
6. Add depth to the Wine
Because we are using acrylic paint, your paint will dry quickly. This is good! We can now do a second layer of paint over the red we just placed, except this time, add a touch of black paint to your red paint mixture to make the red darker. Now paint where you want the darkest parts of the wine to be. You can take a look at what I did for reference, or you can look up a photo.
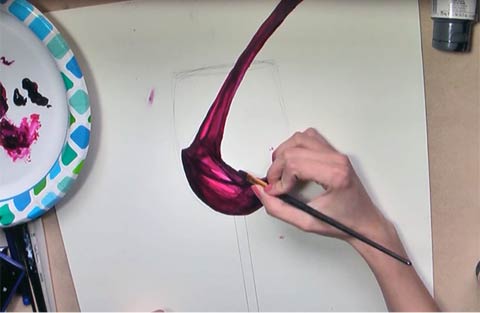
7. Paint the Background
Let’s paint the background! Choose any color you want for the background. I choose brown. We will paint a simple background for our wine. To make it interesting, we will make the brown go from a dark brown on the bottom to a light brown at the top. This is a really nice gradient effect. All you need to do is choose your color and add black to the dark bottom, and as you move up the painting, begin adding white to the color you chose. (Don’t forget to color in the background of the wine glass during this step!)
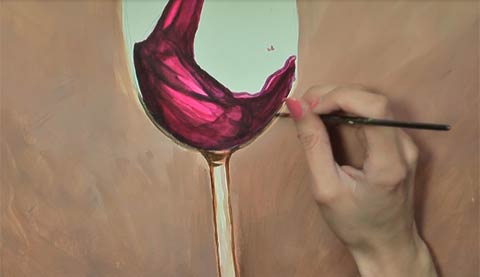
8. Outline the Wine Glass
Outline parts of your wine glass with a touch of brown or red. Don’t outline the entire glass. Leave small spaces that aren’t outlined. This can make it look as if light is touching the glass.

9. Add Highlights
Add a touch white to the brightest areas in the wine and the glass.
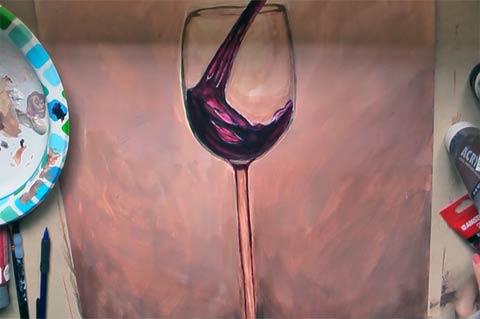
That’s it! You’re done! I hope you have a lot of fun doing this project. Don’t fret if it’s not turning out just the way you want it. Let your art manifest itself while you paint and work with all of those “happy accidents.”
Check out this video to learn how to paint a wine glass.
with Pamela Wang
You can find more painting lessons on Pamela's bio page.
Happy Painting!


New! Comments
Have your say about our drawing lessons! Leave us a comment in the box below.